+++
title = "Kubernetes上でJupyterを稼働させる"
date = 2020-05-10T18:12:22+08:00
description = "データサイエンティスト入門講座を受講するため、Jupyterをお家Kubernetes上で動作させました。"
tags = ["python", "kubernetes"]
categories = ["Visualization"]
author = "kazu634"
images = ["ogp/2020-05-10-jupyter-on-kubernetes.webp"]
+++
Udemyがバーゲンをしていることに気づいたため、日本のゴールデンウィーク期間中は「[【ゼロから始めるデータ分析】 ビジネスケースで学ぶPythonデータサイエンス入門](https://www.udemy.com/course/optworks_1/)」でお勉強をしています。まだ終わっていません。。
この講座は`Jupyter`を用いてデータ分析を進める形でしたので、お家Kubernetes上に`Jupyter`を稼働させることとしました。
## JupyterのDockerイメージを探す
[JupyterのDockerイメージまとめ - Qiita](https://qiita.com/kshigeru/items/ea174d6bcacc474f2a51)でまとめられています。今回は、`datascience-notebook`を使うことにしました。
## JupyterのDockerイメージに日本語フォントを導入する
[Jupyterのmatplotlibを使用する際の日本語豆腐を解決 - Qiita](https://qiita.com/Gvling/items/29516eebccf527e7be5d)を参考にして、日本語フォントを導入します:
```docker
FROM jupyter/datascience-notebook
COPY ./ipag.ttf /opt/conda/lib/python3.7/site-packages/matplotlib/mpl-data/fonts/ttf/ipag.ttf
RUN echo "font.family : IPAGothic" >> /opt/conda/lib/python3.7/site-packages/matplotlib/mpl-data/matplotlibr
c
# Delete font cache
RUN rm -r ./.cache
```
## Kubernetesの設定
Kubernetesの設定をまとめます。
### Persistent Volume
Persistent Volumeはお家NASからNFSで領域を確保しています。
```yaml
apiVersion: v1
kind: PersistentVolume
metadata:
name: nfs-jupyter-work
namespace: jupyter
labels:
name: nfs-jupyter-work
annotations:
volume.beta.kubernetes.io/storage-class: "slow"
spec:
capacity:
storage: 25Gi
accessModes:
- ReadWriteMany
persistentVolumeReclaimPolicy: Retain
mountOptions:
- nfsvers=4.1
nfs:
server: 192.168.10.200
path: /volume1/Shared/kubernetes/jupyter/work
---
apiVersion: v1
kind: PersistentVolume
metadata:
name: nfs-jupyter-config
namespace: jupyter
labels:
name: nfs-jupyter-config
annotations:
volume.beta.kubernetes.io/storage-class: "slow"
spec:
capacity:
storage: 25Gi
accessModes:
- ReadWriteMany
persistentVolumeReclaimPolicy: Retain
mountOptions:
- nfsvers=4.1
nfs:
server: 192.168.10.200
path: /volume1/Shared/kubernetes/jupyter/config
```
### Persistent Volume Claim
確保したPersistent Volumeから、領域を確保します。
```yaml
apiVersion: v1
kind: PersistentVolumeClaim
metadata:
name: jupyter-claim-work
namespace: jupyter
annotations:
volume.beta.kubernetes.io/storage-class: "slow"
spec:
accessModes:
- ReadWriteMany
resources:
requests:
storage: 25Gi
selector:
matchLabels:
name: nfs-jupyter-work
---
apiVersion: v1
kind: PersistentVolumeClaim
metadata:
name: jupyter-claim-config
namespace: jupyter
annotations:
volume.beta.kubernetes.io/storage-class: "slow"
spec:
accessModes:
- ReadWriteMany
resources:
requests:
storage: 25Gi
selector:
matchLabels:
name: nfs-jupyter-config
```
### Deployment
Deploymentの設定で、`Jupyter`のコンテナをデプロイします。レプリカの数は1個にしています。おそらく複数コンテナを起動しても、ステートレスに接続できないと考えたためです。
```yaml
apiVersion: apps/v1
kind: Deployment
metadata:
name: jupyter
namespace: jupyter
labels:
app: jupyter
spec:
replicas: 1
selector:
matchLabels:
app: jupyter
template:
metadata:
labels:
app: jupyter
spec:
containers:
- name: jupyter
image: reg.kazu634.com/kazu634/jupyter
ports:
- containerPort: 8888
env:
- name: CHOWN_HOME
value: "yes"
- name: CHOWN_HOME_OPTS
value: "-R"
- name: GRANT_SUDO
value: "yes"
volumeMounts:
- mountPath: /home/jovyan/work
name: docker-jupyter-work
readOnly: false
- mountPath: /home/jovyan/.jupyter
name: docker-jupyter-config
readOnly: false
volumes:
- name: docker-jupyter-work
persistentVolumeClaim:
claimName: jupyter-claim-work
- name: docker-jupyter-config
persistentVolumeClaim:
claimName: jupyter-claim-config
```
### serviceの設定
serviceの設定は以下になります。プライベートIPアドレスの`192.168.10.210/24`でアクセスできるようにしています。ポート番号は80にしました。
```yaml
apiVersion: v1
kind: Service
metadata:
name: jupyter
namespace: jupyter
spec:
ports:
- name: http
port: 80
protocol: TCP
targetPort: 8888
selector:
app: jupyter
type: LoadBalancer
loadBalancerIP: 192.168.10.210
```
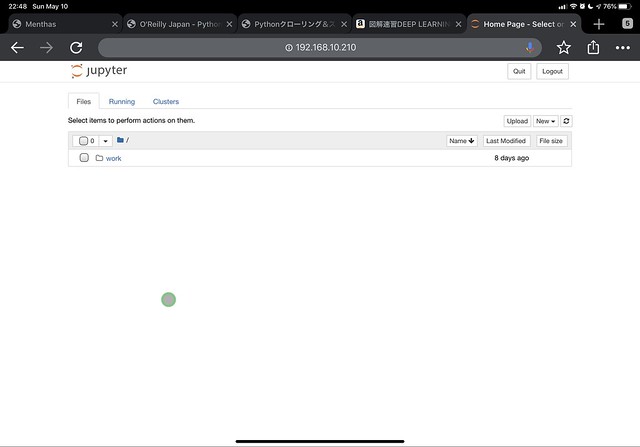
## 動作確認
自宅ネットワークにいる状態でアクセスしたら、無事に接続できました。