+++
title = "VaultのOIDCプロバイダー機能を試してみた"
date = 2021-11-21T22:00:43+09:00
description = "Vault 1.9.0で新しく追加されたOIDC Identity Provider機能を試してみました"
tags = ["Vault"]
categories = ["インフラ", "HashiCorp"]
author = "kazu634"
+++
[Vault as an OIDC Identity Provider \| Vault \- HashiCorp Learn](https://learn.hashicorp.com/tutorials/vault/oidc-identity-provider)を参考にして、`Vault`をOIDC Providerとして利用するようにセットアップしてみました。
## 前提
`Vault`は`root`トークンで使う前提だよ。環境はこちら。`Vault`は事前にセットアップ済み、`Boundary`は新規にインストールする想定です。ただし、`Boundary`のインストール方法などは説明しません([ここ](https://learn.hashicorp.com/tutorials/boundary/getting-started-install)を見てください)。また、`Boundary`サーバには`Docker`を事前に導入しておかないと、手順通りにはいきません。
 ## 事前作業
`v.1.9.0`以前のバージョンから`Vault`をアップグレードして利用する場合には、以下のポリシーを`default`に追加する必要があります:
```
# Allow a token to make requests to the Authorization Endpoint for OIDC providers.
path "identity/oidc/provider/+/authorize" {
capabilities = ["read", "update"]
}
```
`default`ポリシー更新の操作例はこちら:
```bash
kazu634@boundary% vault policy read default > default.policy
kazu634@boundary% cp -P default.policy default.policy.new
kazu634@boundary% vi default.policy.new
kazu634@boundary% diff -u default.policy default.policy.new
--- default.policy 2021-11-23 14:54:30.108548827 +0900
+++ default.policy.new 2021-11-23 14:54:10.384179054 +0900
@@ -85,3 +85,8 @@
path "sys/control-group/request" {
capabilities = ["update"]
}
+
+# Allow a token to make requests to the Authorization Endpoint for OIDC providers.
+path "identity/oidc/provider/+/authorize" {
+ capabilities = ["read", "update"]
+}
kazu634@boundary% vault policy write default default.policy.new
Success! Uploaded policy: default
kazu634@boundary% vault policy read default
# Allow tokens to look up their own properties
path "auth/token/lookup-self" {
capabilities = ["read"]
}
# Allow tokens to renew themselves
path "auth/token/renew-self" {
capabilities = ["update"]
}
# Allow tokens to revoke themselves
path "auth/token/revoke-self" {
capabilities = ["update"]
}
# Allow a token to look up its own capabilities on a path
path "sys/capabilities-self" {
capabilities = ["update"]
}
# Allow a token to look up its own entity by id or name
path "identity/entity/id/{{identity.entity.id}}" {
capabilities = ["read"]
}
path "identity/entity/name/{{identity.entity.name}}" {
capabilities = ["read"]
}
# Allow a token to look up its resultant ACL from all policies. This is useful
# for UIs. It is an internal path because the format may change at any time
# based on how the internal ACL features and capabilities change.
path "sys/internal/ui/resultant-acl" {
capabilities = ["read"]
}
# Allow a token to renew a lease via lease_id in the request body; old path for
# old clients, new path for newer
path "sys/renew" {
capabilities = ["update"]
}
path "sys/leases/renew" {
capabilities = ["update"]
}
# Allow looking up lease properties. This requires knowing the lease ID ahead
# of time and does not divulge any sensitive information.
path "sys/leases/lookup" {
capabilities = ["update"]
}
# Allow a token to manage its own cubbyhole
path "cubbyhole/*" {
capabilities = ["create", "read", "update", "delete", "list"]
}
# Allow a token to wrap arbitrary values in a response-wrapping token
path "sys/wrapping/wrap" {
capabilities = ["update"]
}
# Allow a token to look up the creation time and TTL of a given
# response-wrapping token
path "sys/wrapping/lookup" {
capabilities = ["update"]
}
# Allow a token to unwrap a response-wrapping token. This is a convenience to
# avoid client token swapping since this is also part of the response wrapping
# policy.
path "sys/wrapping/unwrap" {
capabilities = ["update"]
}
# Allow general purpose tools
path "sys/tools/hash" {
capabilities = ["update"]
}
path "sys/tools/hash/*" {
capabilities = ["update"]
}
# Allow checking the status of a Control Group request if the user has the
# accessor
path "sys/control-group/request" {
capabilities = ["update"]
}
# Allow a token to make requests to the Authorization Endpoint for OIDC providers.
path "identity/oidc/provider/+/authorize" {
capabilities = ["read", "update"]
}
```
## Vaultのユーザー、エンティティ、グループの設定
Vaultのユーザー、エンティティ、グループの設定をします。
### Vaultのuserpass認証を有効に
ここでは`userpass`認証を有効にし、`end-user`という名称のユーザーを、パスワードとして`password`で作成しています:
```sh
kazu634@bastion2004% vault auth enable userpass
Success! Enabled userpass auth method at: userpass/
kazu634@bastion2004% vault write auth/userpass/users/end-user \
password="password" \
token_ttl="1h"
Success! Data written to: auth/userpass/users/end-user
```
### アイデンティティ・エンティティの作成
以下のようにしてアイデンティティ・エンティティを作成します。`end-user`という名前のアイデンティティ・エンティティを作成します。
```sh
kazu634@bastion2004% vault write identity/entity \
name="end-user" \
metadata="email=vault@hashicorp.com" \
metadata="phone_number=123-456-7890" \
disabled=false
Key Value
--- -----
aliases
id ea7a76f5-dc85-2d7e-f094-3011a73ee4da
name end-user
```
この`end-user`アイデンティティ・エンティティはメタデータとして、メールアドレスと電話番号を持ちます。
### アイデンティティ・グループの作成
以下のようにしてアイデンティティ・グループを作成します。今回は`engineering`という名前のアイデンティティ・グループを作成します:
```sh
kazu634@bastion2004% ENTITY_ID=$(vault read -field=id identity/entity/name/end-user)
kazu634@bastion2004% vault write identity/group \
name="engineering" \
member_entity_ids="$ENTITY_ID"
Key Value
--- -----
id 6e134b6c-8adc-05e8-d1a1-015d5500c7c6
name engineering
```
### アイデンティティ・エイリアスの作成
`end-user`エンティティと`end-user` userpass ユーザーを同一とみなせるように、アイデンティティ・エイリアスを作成します:
```sh
kazu634@bastion2004% GROUP_ID=$(vault read -field=id identity/group/name/engineering)
kazu634@bastion2004% USERPASS_ACCESSOR=$(vault auth list -detailed -format json | jq -r '.["userpass/"].accessor')
kazu634@bastion2004% vault write identity/entity-alias \
name="end-user" \
canonical_id="$ENTITY_ID" \
mount_accessor="$USERPASS_ACCESSOR"
Key Value
--- -----
canonical_id ea7a76f5-dc85-2d7e-f094-3011a73ee4da
id 7f50040a-be65-e984-7d88-bb40df05b9d2
```
## VaultのOIDCクライアント用設定を作成する
VaultのOIDCクライアントは、以下のリソースにアクセスします:
- `OIDC assignment`
- 暗号化キー
- クライアント・コールバックURL
- TTL
### OIDC assignmentの作成
以下のようにして`OIDC assignment`を作成します:
```sh
kazu634@bastion2004% vault write identity/oidc/assignment/my-assignment \
entity_ids="{$ENTITY_ID}" \
group_ids="${GROUP_ID}"
Success! Data written to: identity/oidc/assignment/my-assignment
```
`Vault`のOIDC認証プロセスは暗号化キーを必要とし、認証フローで作成されたJWTトークンを暗号化、検証します。
### 暗号化キーの作成
以下のようにして暗号化キーを作成します:
```sh
kazu634@bastion2004% vault write identity/oidc/key/my-key \
allowed_client_ids="*" \
verification_ttl="2h" \
rotation_period="1h" \
algorithm="RS256"
Success! Data written to: identity/oidc/key/my-key
```
`allowed_client_ids`に`*`が指定されているため、この暗号化キーはすべての`Vault` OIDCクライアントで利用できます。
### OIDCクライアントの作成
`boundary`という名前のOIDCクライアントを作成します:
```sh
kazu634@bastion2004% vault write identity/oidc/client/boundary \
redirect_uris="http://192.168.10.175:9200/v1/auth-methods/oidc:authenticate:callback" \
assignments="my-assignment" \
key="my-key" \
id_token_ttl="30m" \
access_token_ttl="1h"
Success! Data written to: identity/oidc/client/boundary
```
`redirect_uris`はクライアントのコールバックURLを指定します。`http://192.168.10.175:9200/v1/auth-methods/oidc:authenticate:callback`は、デフォルトポートを利用して稼働する`Boundary`のアドレスです。`assignments`は、`my-assignment`で定義されたエンティティとグループにアクセスを制限します。`id_token_ttl`は`ID`トークンの期限切れ時間を30分に指定しています。`access_token_ttl`は、アクセストークンの有効期限を1時間に指定します。
この辺は通常プロバイダー側で実施するOIDCの設定な気がします。
最後にクライアントIDを変数に格納します:
```sh
kazu634@bastion2004% CLIENT_ID=$(vault read -field=client_id identity/oidc/client/boundary)
```
## OIDCプロバイダーの作成
VaultのOIDCプロバイダーは一つ以上のVault OIDCスコープをサポートします。これらのスコープはテンプレートで指定されたメタデータクレームを定義します。メタデータクレームは、ユーザーとOIDCサービスに関する情報を含んだキー・バリュー・ペアーです。
### ユーザースコープの作成
`USER_SCOPE_TEMPLATE`という変数を作成し、ユーザー・スコープ・テンプレートを格納します:
```sh
kazu634@bastion2004% USER_SCOPE_TEMPLATE=$(cat << EOF
{
"username": {{identity.entity.name}},
"contact": {
"email": {{identity.entity.metadata.email}},
"phone_number": {{identity.entity.metadata.phone_number}}
}
}
EOF
)
```
このテンプレートはエンティティのメタデータからメールアドレスと電話番号を取得します。次のコマンドを実行して、このユーザースコープテンプレートを利用して、`user`という名前のVault OIDCスコープを作成します:
```sh
kazu634@bastion2004% vault write identity/oidc/scope/user \
description="The user scope provides claims using Vault identity entity metadata" \
template="$(echo ${USER_SCOPE_TEMPLATE} | base64 -)"
Success! Data written to: identity/oidc/scope/user
```
### グループスコープの作成
`GROUPS_SCOPE_TEMPLATE`という変数にグループスコープテンプレートを格納します:
```sh
kazu634@bastion2004% GROUPS_SCOPE_TEMPLATE=$(cat << EOF
{
"groups": {{identity.entity.groups.names}}
}
EOF
)
```
このテンプレートは定義されたすべてのグループ名を取得します。このグループスコープテンプレートを用いて、`group`という名称のVaultのOIDCスコープを作成します:
```sh
kazu634@bastion2004% vault write identity/oidc/scope/groups \
description="The groups scope provides the groups claim using Vault group membership" \
template="$(echo ${GROUPS_SCOPE_TEMPLATE} | base64 -)"
Success! Data written to: identity/oidc/scope/groups
```
VautのOIDCプロバイダーには、クライアントIDとスコープのリストが必要です。
### OIDCプロバイダーの作成
`my-provider`という名前のVault OIDCプロバイダーを作成します:
```sh
kazu634@bastion2004% vault write identity/oidc/provider/my-provider \
allowed_client_ids="${CLIENT_ID}" \
scopes_supported="groups,user"
Success! Data written to: identity/oidc/provider/my-provider
```
このプロバイダーは`boundary`のクライアントアクセスを許可します。
### 各種情報の確認
VaultのOIDC設定のためのエンドポイント情報を表示します:
```sh
kazu634@bastion2004% curl -s $VAULT_ADDR/v1/identity/oidc/provider/my-provider/.well-known/openid-configuration | jq
{
"issuer": "http://192.168.10.142:8200/v1/identity/oidc/provider/my-provider",
"jwks_uri": "http://192.168.10.142:8200/v1/identity/oidc/provider/my-provider/.well-known/keys",
"authorization_endpoint": "http://192.168.10.142:8200/ui/vault/identity/oidc/provider/my-provider/authorize",
"token_endpoint": "http://192.168.10.142:8200/v1/identity/oidc/provider/my-provider/token",
"userinfo_endpoint": "http://192.168.10.142:8200/v1/identity/oidc/provider/my-provider/userinfo",
"request_uri_parameter_supported": false,
"id_token_signing_alg_values_supported": [
"RS256",
"RS384",
"RS512",
"ES256",
"ES384",
"ES512",
"EdDSA"
],
"response_types_supported": [
"code"
],
"scopes_supported": [
"groups",
"user",
"openid"
],
"subject_types_supported": [
"public"
],
"grant_types_supported": [
"authorization_code"
],
"token_endpoint_auth_methods_supported": [
"client_secret_basic"
]
}
```
VaultのOIDCパブリックキーの情報を表示します:
```sh
kazu634@bastion2004% curl -s $VAULT_ADDR/v1/identity/oidc/provider/my-provider/.well-known/keys | jq
{
"keys": [
{
"use": "sig",
"kty": "RSA",
"kid": "c9ca478d-a2e2-fbf2-d514-2b8eda568f19",
"alg": "RS256",
"n": "42ko31pO37ARuFcadCOvi6z4S4andET-DgR306sGftasp6aeg1AOiditfmPDe_Gn953FBqvqmUEK9Dvg1dgypIcSWUevJmN9z4_fLA1hC9DmUjKGivNlqwRqFwSg2O6pljQzLH8ZXw16fxrWDUUCoke2IrPEsgYR40AoEhGxqWUwZTlimK_M-utr76DvnmY1XbZpPQLn88zq33noNVWmoCF41Fmf2ZWxz5LGXYGX3ZudeO5SQMzES_pU7JJ-xxHpKTqAoTJqU1g6pnz5tO6N6aZ9AwIAoVTzLq5h9ybrFeSEvkcdScaU9JHchabhjqdAFO1d8zicZh60wIfFbMHFTw",
"e": "AQAB"
},
{
"use": "sig",
"kty": "RSA",
"kid": "11e6dcf7-25bf-bf92-23b2-216827915508",
"alg": "RS256",
"n": "3PVhLrhzMG-FkqgyOaCppgkEL-hjcwW_aHoL54RvFV4Erh2USZXQSnZXNZtXjSB4RMq8LJZA7bfeEg9FwUEIauOcYJEK4eXSDU7hiYk2tKtyrAuESebdMWz73c9EZ_Uf5Y8FMc1aMQ4YNi7DKo92BWfhTI6Am9_si_59kLUuOo4XqMgA_lUCypuKjT2k54a3yNIHsyA2Rj_xr3C7bDCUUe1VEMMd27SuG0w3uMxBXHbs7PS4CTYawrWGCw79gRhj7c2uKj1jyQiRhD16_bmQMdyNBgo48jj8WXA7c7Oq1X_fY7DelTvvtCtQwiT5awjX9SabOxvJds0z_zhaw-Ysww",
"e": "AQAB"
}
]
}
```
## Boundaryの起動・セットアップ
`Boundary`の起動・セットアップについて説明します。
### Boundaryの起動
別なターミナルで`Boundary`を起動します。ここでは`localhost`ではなく、`-host-address`と`-api-listen-address`オプションを指定して、`192.168.10.175`にバインドさせています:
```sh
kazu634@boundary% sudo boundary dev -host-address=192.168.10.175 -api-listen-address=192.168.10.175
[sudo] password for kazu634:
==> Boundary server configuration:
[Controller] AEAD Key Bytes: MRxx7K8uM05eT3TZ+lB+SOH1nlcITx7+lVAdfOgVypY=
[Recovery] AEAD Key Bytes: bc3rdR3DurJKo8j+d4I8JO0VzKWueE7LOdSiLK/1RRo=
[Worker-Auth] AEAD Key Bytes: dnJYhTV0gQg67Sg4slxuL+D+/ctMxGIqlpmDFDWqDeo=
[Recovery] AEAD Type: aes-gcm
[Root] AEAD Type: aes-gcm
[Worker-Auth] AEAD Type: aes-gcm
Cgo: disabled
Controller Public Cluster Addr: 127.0.0.1:9201
Dev Database Container: gracious_jemison
Dev Database Url: postgres://postgres:password@localhost:49156/boundary?sslmode=disable
Generated Admin Login Name: admin
Generated Admin Password: password
Generated Host Catalog Id: hcst_1234567890
Generated Host Id: hst_1234567890
Generated Host Set Id: hsst_1234567890
Generated Oidc Auth Method Id: amoidc_1234567890
Generated Org Scope Id: o_1234567890
Generated Password Auth Method Id: ampw_1234567890
Generated Project Scope Id: p_1234567890
Generated Target Id: ttcp_1234567890
Generated Unprivileged Login Name: user
Generated Unprivileged Password: password
Listener 1: tcp (addr: "192.168.10.175:9200", cors_allowed_headers: "[]", cors_allowed_origins: "[*]", cors_enabled: "true", max_request_duration: "1m30s", purpose: "api")
Listener 2: tcp (addr: "127.0.0.1:9201", max_request_duration: "1m30s", purpose: "cluster")
Listener 3: tcp (addr: "127.0.0.1:9202", max_request_duration: "1m30s", purpose: "proxy")
Log Level: info
Mlock: supported: true, enabled: false
Version: Boundary v0.7.1
Version Sha: abd695e5bc42d01e4412bf6c76211c3fc93a93d7
Worker Public Proxy Addr: 127.0.0.1:9202
==> Boundary server started! Log data will stream in below:
```
### Boundaryのセットアップ
元のターミナルに戻って、`Boundary`の設定を行います。`192.168.10.175`にバインドしているため、`BOUNDARY_ADDR`環境変数を指定します:
```sh
kazu634@boundary% export BOUNDARY_ADDR=http://192.168.10.175:9200
```
その後、`admin`ユーザーのパスワードを指定します:
```sh
kazu634@boundary% boundary authenticate password \
-auth-method-id ampw_1234567890 \
-login-name admin \
-password password
Error opening keyring: Specified keyring backend not available
Token must be provided via BOUNDARY_TOKEN env var or -token flag. Reading the token can also be disabled via -keyring-type=none.
Authentication information:
Account ID: acctpw_1234567890
Auth Method ID: ampw_1234567890
Expiration Time: Sat, 27 Nov 2021 10:10:39 JST
User ID: u_1234567890
Error opening "pass" keyring: Specified keyring backend not available
The token was not successfully saved to a system keyring. The token is:
at_CP320WuH7f_s12TyNg8Rivoqi5fzP1TSoUrfthCuGpbwwm21f5phbKQUj1EYhbTXQHfZGoTSWm6qUYeAjfgzpbaQwDrWGfi2KdrypBLSEuYL1vpgNd1xocE3q
It must be manually passed in via the BOUNDARY_TOKEN env var or -token flag. Storing the token can also be disabled via -keyring-type=none.
```
ここで表示されたトークンを環境変数`BOUNDARY_TOKEN`に格納します:
```bash
kazu634@boundary% export BOUNDARY_TOKEN=at_CP320WuH7f_s12TyNg8Rivoqi5fzP1TSoUrfthCuGpbwwm21f5phbKQUj1EYhbTXQHfZGoTSWm6qUYeAjfgzpbaQwDrWGfi2KdrypBLSEuYL1vpgNd1xocE3q
```
### BoundaryのOIDC認証の設定
次のようにしてOIDC認証の設定を行います。`ISSUER`という環境変数を定義して、そこに`my-provider`の`issuer`フィールドの値を格納します:
```bash
kazu634@boundary% ISSUER=$(curl -s $VAULT_ADDR/v1/identity/oidc/provider/my-provider/.well-known/openid-configuration | jq -r .issuer)
kazu634@boundary% echo ${ISSUER}
http://192.168.10.142:8200/v1/identity/oidc/provider/my-provider
```
環境変数`CLIENT_SECRET`に、Vault OIDCクライアント`boundary`の`client_secret`フィールドに格納された値を格納します:
```bash
kazu634@boundary% CLIENT_SECRET=$(vault read -field=client_secret identity/oidc/client/boundary)
kazu634@boundary% echo ${CLIENT_SECRET}
hvo_secret_ZmxtbxiyWtjo9dVpU9BJZhR1bQVbczMRjTuZZHlf1HEfHaKZFOwGyDCoOKuaQAw9
```
VaultのOIDCプロバイダーを利用するように設定した、新しい認証方法を定義します:
```bash
kazu634@boundary% boundary auth-methods create oidc \
-issuer "${ISSUER}" \
-client-id "${CLIENT_ID}" \
-client-secret "${CLIENT_SECRET}" \
-signing-algorithm RS256 \
-api-url-prefix "http://192.168.10.175:9200" \
-claims-scopes "groups" \
-claims-scopes "user" \
-max-age 20 \
-name "Vault OIDC Provider"
Auth Method information:
Created Time: Sat, 20 Nov 2021 10:14:51 JST
ID: amoidc_TUXAIBhxIF
Name: Vault OIDC Provider
Type: oidc
Updated Time: Sat, 20 Nov 2021 10:14:51 JST
Version: 1
Scope:
ID: global
Name: global
Type: global
Authorized Actions:
no-op
read
update
delete
change-state
authenticate
Authorized Actions on Auth Method's Collections:
accounts:
create
list
managed-groups:
create
list
Attributes:
api_url_prefix: http://192.168.10.175:9200
callback_url: http://192.168.10.175:9200/v1/auth-methods/oidc:authenticate:callback
claims_scopes: [groups user]
client_id: VploN0lIIZEVpqAhN7xJS3eDnLYRMGR4
client_secret_hmac: qCpF9Qb5XxlnBOKn0m8iRG7Ns00U5naYxD-dTYuwlc8
issuer: http://192.168.10.142:8200/v1/identity/oidc/provider/my-provider
max_age: 20
signing_algorithms: [RS256]
state: inactive
```
`AUTH_METHOD_ID`という環境変数に認証方式IDを格納します:
```bash
kazu634@boundary% AUTH_METHOD_ID="$(boundary auth-methods list -format json | jq -r '.items[] | select(.name == "Vault OIDC Provider") | .id')"
kazu634@boundary% echo ${AUTH_METHOD_ID}
amoidc_TUXAIBhxIF
```
認証方式の状態を`active-public`に変更します:
```bash
kazu634@boundary% boundary auth-methods change-state oidc \
-id "${AUTH_METHOD_ID}" \
-state active-public
Auth Method information:
Created Time: Sat, 20 Nov 2021 10:14:51 JST
ID: amoidc_TUXAIBhxIF
Name: Vault OIDC Provider
Type: oidc
Updated Time: Sat, 20 Nov 2021 10:16:06 JST
Version: 2
Scope:
ID: global
Name: global
Type: global
Authorized Actions:
no-op
read
update
delete
change-state
authenticate
Authorized Actions on Auth Method's Collections:
accounts:
create
list
managed-groups:
create
list
Attributes:
api_url_prefix: http://192.168.10.175:9200
callback_url: http://192.168.10.175:9200/v1/auth-methods/oidc:authenticate:callback
claims_scopes: [groups user]
client_id: VploN0lIIZEVpqAhN7xJS3eDnLYRMGR4
client_secret_hmac: qCpF9Qb5XxlnBOKn0m8iRG7Ns00U5naYxD-dTYuwlc8
issuer: http://192.168.10.142:8200/v1/identity/oidc/provider/my-provider
max_age: 20
signing_algorithms: [RS256]
state: active-public
```
`global`スコープでOIDC認証方式を利用できるようにします:
```bash
kazu634@boundary% boundary scopes update \
-primary-auth-method-id "${AUTH_METHOD_ID}" \
-id global
Scope information:
Created Time: Sat, 20 Nov 2021 10:10:04 JST
Description: Global Scope
ID: global
Name: global
Primary Auth Method ID: amoidc_TUXAIBhxIF
Updated Time: Sat, 20 Nov 2021 10:16:26 JST
Version: 3
Scope (parent):
ID: global
Name: global
Type: global
Authorized Actions:
no-op
read
update
delete
Authorized Actions on Scope's Collections:
auth-methods:
create
list
auth-tokens:
list
groups:
create
list
roles:
create
list
scopes:
create
list
users:
create
list
```
## 動作確認
ブラウザーで`http://192.168.10.175:9200`にアクセスすると、以下のように表示されるはずです:
## 事前作業
`v.1.9.0`以前のバージョンから`Vault`をアップグレードして利用する場合には、以下のポリシーを`default`に追加する必要があります:
```
# Allow a token to make requests to the Authorization Endpoint for OIDC providers.
path "identity/oidc/provider/+/authorize" {
capabilities = ["read", "update"]
}
```
`default`ポリシー更新の操作例はこちら:
```bash
kazu634@boundary% vault policy read default > default.policy
kazu634@boundary% cp -P default.policy default.policy.new
kazu634@boundary% vi default.policy.new
kazu634@boundary% diff -u default.policy default.policy.new
--- default.policy 2021-11-23 14:54:30.108548827 +0900
+++ default.policy.new 2021-11-23 14:54:10.384179054 +0900
@@ -85,3 +85,8 @@
path "sys/control-group/request" {
capabilities = ["update"]
}
+
+# Allow a token to make requests to the Authorization Endpoint for OIDC providers.
+path "identity/oidc/provider/+/authorize" {
+ capabilities = ["read", "update"]
+}
kazu634@boundary% vault policy write default default.policy.new
Success! Uploaded policy: default
kazu634@boundary% vault policy read default
# Allow tokens to look up their own properties
path "auth/token/lookup-self" {
capabilities = ["read"]
}
# Allow tokens to renew themselves
path "auth/token/renew-self" {
capabilities = ["update"]
}
# Allow tokens to revoke themselves
path "auth/token/revoke-self" {
capabilities = ["update"]
}
# Allow a token to look up its own capabilities on a path
path "sys/capabilities-self" {
capabilities = ["update"]
}
# Allow a token to look up its own entity by id or name
path "identity/entity/id/{{identity.entity.id}}" {
capabilities = ["read"]
}
path "identity/entity/name/{{identity.entity.name}}" {
capabilities = ["read"]
}
# Allow a token to look up its resultant ACL from all policies. This is useful
# for UIs. It is an internal path because the format may change at any time
# based on how the internal ACL features and capabilities change.
path "sys/internal/ui/resultant-acl" {
capabilities = ["read"]
}
# Allow a token to renew a lease via lease_id in the request body; old path for
# old clients, new path for newer
path "sys/renew" {
capabilities = ["update"]
}
path "sys/leases/renew" {
capabilities = ["update"]
}
# Allow looking up lease properties. This requires knowing the lease ID ahead
# of time and does not divulge any sensitive information.
path "sys/leases/lookup" {
capabilities = ["update"]
}
# Allow a token to manage its own cubbyhole
path "cubbyhole/*" {
capabilities = ["create", "read", "update", "delete", "list"]
}
# Allow a token to wrap arbitrary values in a response-wrapping token
path "sys/wrapping/wrap" {
capabilities = ["update"]
}
# Allow a token to look up the creation time and TTL of a given
# response-wrapping token
path "sys/wrapping/lookup" {
capabilities = ["update"]
}
# Allow a token to unwrap a response-wrapping token. This is a convenience to
# avoid client token swapping since this is also part of the response wrapping
# policy.
path "sys/wrapping/unwrap" {
capabilities = ["update"]
}
# Allow general purpose tools
path "sys/tools/hash" {
capabilities = ["update"]
}
path "sys/tools/hash/*" {
capabilities = ["update"]
}
# Allow checking the status of a Control Group request if the user has the
# accessor
path "sys/control-group/request" {
capabilities = ["update"]
}
# Allow a token to make requests to the Authorization Endpoint for OIDC providers.
path "identity/oidc/provider/+/authorize" {
capabilities = ["read", "update"]
}
```
## Vaultのユーザー、エンティティ、グループの設定
Vaultのユーザー、エンティティ、グループの設定をします。
### Vaultのuserpass認証を有効に
ここでは`userpass`認証を有効にし、`end-user`という名称のユーザーを、パスワードとして`password`で作成しています:
```sh
kazu634@bastion2004% vault auth enable userpass
Success! Enabled userpass auth method at: userpass/
kazu634@bastion2004% vault write auth/userpass/users/end-user \
password="password" \
token_ttl="1h"
Success! Data written to: auth/userpass/users/end-user
```
### アイデンティティ・エンティティの作成
以下のようにしてアイデンティティ・エンティティを作成します。`end-user`という名前のアイデンティティ・エンティティを作成します。
```sh
kazu634@bastion2004% vault write identity/entity \
name="end-user" \
metadata="email=vault@hashicorp.com" \
metadata="phone_number=123-456-7890" \
disabled=false
Key Value
--- -----
aliases
id ea7a76f5-dc85-2d7e-f094-3011a73ee4da
name end-user
```
この`end-user`アイデンティティ・エンティティはメタデータとして、メールアドレスと電話番号を持ちます。
### アイデンティティ・グループの作成
以下のようにしてアイデンティティ・グループを作成します。今回は`engineering`という名前のアイデンティティ・グループを作成します:
```sh
kazu634@bastion2004% ENTITY_ID=$(vault read -field=id identity/entity/name/end-user)
kazu634@bastion2004% vault write identity/group \
name="engineering" \
member_entity_ids="$ENTITY_ID"
Key Value
--- -----
id 6e134b6c-8adc-05e8-d1a1-015d5500c7c6
name engineering
```
### アイデンティティ・エイリアスの作成
`end-user`エンティティと`end-user` userpass ユーザーを同一とみなせるように、アイデンティティ・エイリアスを作成します:
```sh
kazu634@bastion2004% GROUP_ID=$(vault read -field=id identity/group/name/engineering)
kazu634@bastion2004% USERPASS_ACCESSOR=$(vault auth list -detailed -format json | jq -r '.["userpass/"].accessor')
kazu634@bastion2004% vault write identity/entity-alias \
name="end-user" \
canonical_id="$ENTITY_ID" \
mount_accessor="$USERPASS_ACCESSOR"
Key Value
--- -----
canonical_id ea7a76f5-dc85-2d7e-f094-3011a73ee4da
id 7f50040a-be65-e984-7d88-bb40df05b9d2
```
## VaultのOIDCクライアント用設定を作成する
VaultのOIDCクライアントは、以下のリソースにアクセスします:
- `OIDC assignment`
- 暗号化キー
- クライアント・コールバックURL
- TTL
### OIDC assignmentの作成
以下のようにして`OIDC assignment`を作成します:
```sh
kazu634@bastion2004% vault write identity/oidc/assignment/my-assignment \
entity_ids="{$ENTITY_ID}" \
group_ids="${GROUP_ID}"
Success! Data written to: identity/oidc/assignment/my-assignment
```
`Vault`のOIDC認証プロセスは暗号化キーを必要とし、認証フローで作成されたJWTトークンを暗号化、検証します。
### 暗号化キーの作成
以下のようにして暗号化キーを作成します:
```sh
kazu634@bastion2004% vault write identity/oidc/key/my-key \
allowed_client_ids="*" \
verification_ttl="2h" \
rotation_period="1h" \
algorithm="RS256"
Success! Data written to: identity/oidc/key/my-key
```
`allowed_client_ids`に`*`が指定されているため、この暗号化キーはすべての`Vault` OIDCクライアントで利用できます。
### OIDCクライアントの作成
`boundary`という名前のOIDCクライアントを作成します:
```sh
kazu634@bastion2004% vault write identity/oidc/client/boundary \
redirect_uris="http://192.168.10.175:9200/v1/auth-methods/oidc:authenticate:callback" \
assignments="my-assignment" \
key="my-key" \
id_token_ttl="30m" \
access_token_ttl="1h"
Success! Data written to: identity/oidc/client/boundary
```
`redirect_uris`はクライアントのコールバックURLを指定します。`http://192.168.10.175:9200/v1/auth-methods/oidc:authenticate:callback`は、デフォルトポートを利用して稼働する`Boundary`のアドレスです。`assignments`は、`my-assignment`で定義されたエンティティとグループにアクセスを制限します。`id_token_ttl`は`ID`トークンの期限切れ時間を30分に指定しています。`access_token_ttl`は、アクセストークンの有効期限を1時間に指定します。
この辺は通常プロバイダー側で実施するOIDCの設定な気がします。
最後にクライアントIDを変数に格納します:
```sh
kazu634@bastion2004% CLIENT_ID=$(vault read -field=client_id identity/oidc/client/boundary)
```
## OIDCプロバイダーの作成
VaultのOIDCプロバイダーは一つ以上のVault OIDCスコープをサポートします。これらのスコープはテンプレートで指定されたメタデータクレームを定義します。メタデータクレームは、ユーザーとOIDCサービスに関する情報を含んだキー・バリュー・ペアーです。
### ユーザースコープの作成
`USER_SCOPE_TEMPLATE`という変数を作成し、ユーザー・スコープ・テンプレートを格納します:
```sh
kazu634@bastion2004% USER_SCOPE_TEMPLATE=$(cat << EOF
{
"username": {{identity.entity.name}},
"contact": {
"email": {{identity.entity.metadata.email}},
"phone_number": {{identity.entity.metadata.phone_number}}
}
}
EOF
)
```
このテンプレートはエンティティのメタデータからメールアドレスと電話番号を取得します。次のコマンドを実行して、このユーザースコープテンプレートを利用して、`user`という名前のVault OIDCスコープを作成します:
```sh
kazu634@bastion2004% vault write identity/oidc/scope/user \
description="The user scope provides claims using Vault identity entity metadata" \
template="$(echo ${USER_SCOPE_TEMPLATE} | base64 -)"
Success! Data written to: identity/oidc/scope/user
```
### グループスコープの作成
`GROUPS_SCOPE_TEMPLATE`という変数にグループスコープテンプレートを格納します:
```sh
kazu634@bastion2004% GROUPS_SCOPE_TEMPLATE=$(cat << EOF
{
"groups": {{identity.entity.groups.names}}
}
EOF
)
```
このテンプレートは定義されたすべてのグループ名を取得します。このグループスコープテンプレートを用いて、`group`という名称のVaultのOIDCスコープを作成します:
```sh
kazu634@bastion2004% vault write identity/oidc/scope/groups \
description="The groups scope provides the groups claim using Vault group membership" \
template="$(echo ${GROUPS_SCOPE_TEMPLATE} | base64 -)"
Success! Data written to: identity/oidc/scope/groups
```
VautのOIDCプロバイダーには、クライアントIDとスコープのリストが必要です。
### OIDCプロバイダーの作成
`my-provider`という名前のVault OIDCプロバイダーを作成します:
```sh
kazu634@bastion2004% vault write identity/oidc/provider/my-provider \
allowed_client_ids="${CLIENT_ID}" \
scopes_supported="groups,user"
Success! Data written to: identity/oidc/provider/my-provider
```
このプロバイダーは`boundary`のクライアントアクセスを許可します。
### 各種情報の確認
VaultのOIDC設定のためのエンドポイント情報を表示します:
```sh
kazu634@bastion2004% curl -s $VAULT_ADDR/v1/identity/oidc/provider/my-provider/.well-known/openid-configuration | jq
{
"issuer": "http://192.168.10.142:8200/v1/identity/oidc/provider/my-provider",
"jwks_uri": "http://192.168.10.142:8200/v1/identity/oidc/provider/my-provider/.well-known/keys",
"authorization_endpoint": "http://192.168.10.142:8200/ui/vault/identity/oidc/provider/my-provider/authorize",
"token_endpoint": "http://192.168.10.142:8200/v1/identity/oidc/provider/my-provider/token",
"userinfo_endpoint": "http://192.168.10.142:8200/v1/identity/oidc/provider/my-provider/userinfo",
"request_uri_parameter_supported": false,
"id_token_signing_alg_values_supported": [
"RS256",
"RS384",
"RS512",
"ES256",
"ES384",
"ES512",
"EdDSA"
],
"response_types_supported": [
"code"
],
"scopes_supported": [
"groups",
"user",
"openid"
],
"subject_types_supported": [
"public"
],
"grant_types_supported": [
"authorization_code"
],
"token_endpoint_auth_methods_supported": [
"client_secret_basic"
]
}
```
VaultのOIDCパブリックキーの情報を表示します:
```sh
kazu634@bastion2004% curl -s $VAULT_ADDR/v1/identity/oidc/provider/my-provider/.well-known/keys | jq
{
"keys": [
{
"use": "sig",
"kty": "RSA",
"kid": "c9ca478d-a2e2-fbf2-d514-2b8eda568f19",
"alg": "RS256",
"n": "42ko31pO37ARuFcadCOvi6z4S4andET-DgR306sGftasp6aeg1AOiditfmPDe_Gn953FBqvqmUEK9Dvg1dgypIcSWUevJmN9z4_fLA1hC9DmUjKGivNlqwRqFwSg2O6pljQzLH8ZXw16fxrWDUUCoke2IrPEsgYR40AoEhGxqWUwZTlimK_M-utr76DvnmY1XbZpPQLn88zq33noNVWmoCF41Fmf2ZWxz5LGXYGX3ZudeO5SQMzES_pU7JJ-xxHpKTqAoTJqU1g6pnz5tO6N6aZ9AwIAoVTzLq5h9ybrFeSEvkcdScaU9JHchabhjqdAFO1d8zicZh60wIfFbMHFTw",
"e": "AQAB"
},
{
"use": "sig",
"kty": "RSA",
"kid": "11e6dcf7-25bf-bf92-23b2-216827915508",
"alg": "RS256",
"n": "3PVhLrhzMG-FkqgyOaCppgkEL-hjcwW_aHoL54RvFV4Erh2USZXQSnZXNZtXjSB4RMq8LJZA7bfeEg9FwUEIauOcYJEK4eXSDU7hiYk2tKtyrAuESebdMWz73c9EZ_Uf5Y8FMc1aMQ4YNi7DKo92BWfhTI6Am9_si_59kLUuOo4XqMgA_lUCypuKjT2k54a3yNIHsyA2Rj_xr3C7bDCUUe1VEMMd27SuG0w3uMxBXHbs7PS4CTYawrWGCw79gRhj7c2uKj1jyQiRhD16_bmQMdyNBgo48jj8WXA7c7Oq1X_fY7DelTvvtCtQwiT5awjX9SabOxvJds0z_zhaw-Ysww",
"e": "AQAB"
}
]
}
```
## Boundaryの起動・セットアップ
`Boundary`の起動・セットアップについて説明します。
### Boundaryの起動
別なターミナルで`Boundary`を起動します。ここでは`localhost`ではなく、`-host-address`と`-api-listen-address`オプションを指定して、`192.168.10.175`にバインドさせています:
```sh
kazu634@boundary% sudo boundary dev -host-address=192.168.10.175 -api-listen-address=192.168.10.175
[sudo] password for kazu634:
==> Boundary server configuration:
[Controller] AEAD Key Bytes: MRxx7K8uM05eT3TZ+lB+SOH1nlcITx7+lVAdfOgVypY=
[Recovery] AEAD Key Bytes: bc3rdR3DurJKo8j+d4I8JO0VzKWueE7LOdSiLK/1RRo=
[Worker-Auth] AEAD Key Bytes: dnJYhTV0gQg67Sg4slxuL+D+/ctMxGIqlpmDFDWqDeo=
[Recovery] AEAD Type: aes-gcm
[Root] AEAD Type: aes-gcm
[Worker-Auth] AEAD Type: aes-gcm
Cgo: disabled
Controller Public Cluster Addr: 127.0.0.1:9201
Dev Database Container: gracious_jemison
Dev Database Url: postgres://postgres:password@localhost:49156/boundary?sslmode=disable
Generated Admin Login Name: admin
Generated Admin Password: password
Generated Host Catalog Id: hcst_1234567890
Generated Host Id: hst_1234567890
Generated Host Set Id: hsst_1234567890
Generated Oidc Auth Method Id: amoidc_1234567890
Generated Org Scope Id: o_1234567890
Generated Password Auth Method Id: ampw_1234567890
Generated Project Scope Id: p_1234567890
Generated Target Id: ttcp_1234567890
Generated Unprivileged Login Name: user
Generated Unprivileged Password: password
Listener 1: tcp (addr: "192.168.10.175:9200", cors_allowed_headers: "[]", cors_allowed_origins: "[*]", cors_enabled: "true", max_request_duration: "1m30s", purpose: "api")
Listener 2: tcp (addr: "127.0.0.1:9201", max_request_duration: "1m30s", purpose: "cluster")
Listener 3: tcp (addr: "127.0.0.1:9202", max_request_duration: "1m30s", purpose: "proxy")
Log Level: info
Mlock: supported: true, enabled: false
Version: Boundary v0.7.1
Version Sha: abd695e5bc42d01e4412bf6c76211c3fc93a93d7
Worker Public Proxy Addr: 127.0.0.1:9202
==> Boundary server started! Log data will stream in below:
```
### Boundaryのセットアップ
元のターミナルに戻って、`Boundary`の設定を行います。`192.168.10.175`にバインドしているため、`BOUNDARY_ADDR`環境変数を指定します:
```sh
kazu634@boundary% export BOUNDARY_ADDR=http://192.168.10.175:9200
```
その後、`admin`ユーザーのパスワードを指定します:
```sh
kazu634@boundary% boundary authenticate password \
-auth-method-id ampw_1234567890 \
-login-name admin \
-password password
Error opening keyring: Specified keyring backend not available
Token must be provided via BOUNDARY_TOKEN env var or -token flag. Reading the token can also be disabled via -keyring-type=none.
Authentication information:
Account ID: acctpw_1234567890
Auth Method ID: ampw_1234567890
Expiration Time: Sat, 27 Nov 2021 10:10:39 JST
User ID: u_1234567890
Error opening "pass" keyring: Specified keyring backend not available
The token was not successfully saved to a system keyring. The token is:
at_CP320WuH7f_s12TyNg8Rivoqi5fzP1TSoUrfthCuGpbwwm21f5phbKQUj1EYhbTXQHfZGoTSWm6qUYeAjfgzpbaQwDrWGfi2KdrypBLSEuYL1vpgNd1xocE3q
It must be manually passed in via the BOUNDARY_TOKEN env var or -token flag. Storing the token can also be disabled via -keyring-type=none.
```
ここで表示されたトークンを環境変数`BOUNDARY_TOKEN`に格納します:
```bash
kazu634@boundary% export BOUNDARY_TOKEN=at_CP320WuH7f_s12TyNg8Rivoqi5fzP1TSoUrfthCuGpbwwm21f5phbKQUj1EYhbTXQHfZGoTSWm6qUYeAjfgzpbaQwDrWGfi2KdrypBLSEuYL1vpgNd1xocE3q
```
### BoundaryのOIDC認証の設定
次のようにしてOIDC認証の設定を行います。`ISSUER`という環境変数を定義して、そこに`my-provider`の`issuer`フィールドの値を格納します:
```bash
kazu634@boundary% ISSUER=$(curl -s $VAULT_ADDR/v1/identity/oidc/provider/my-provider/.well-known/openid-configuration | jq -r .issuer)
kazu634@boundary% echo ${ISSUER}
http://192.168.10.142:8200/v1/identity/oidc/provider/my-provider
```
環境変数`CLIENT_SECRET`に、Vault OIDCクライアント`boundary`の`client_secret`フィールドに格納された値を格納します:
```bash
kazu634@boundary% CLIENT_SECRET=$(vault read -field=client_secret identity/oidc/client/boundary)
kazu634@boundary% echo ${CLIENT_SECRET}
hvo_secret_ZmxtbxiyWtjo9dVpU9BJZhR1bQVbczMRjTuZZHlf1HEfHaKZFOwGyDCoOKuaQAw9
```
VaultのOIDCプロバイダーを利用するように設定した、新しい認証方法を定義します:
```bash
kazu634@boundary% boundary auth-methods create oidc \
-issuer "${ISSUER}" \
-client-id "${CLIENT_ID}" \
-client-secret "${CLIENT_SECRET}" \
-signing-algorithm RS256 \
-api-url-prefix "http://192.168.10.175:9200" \
-claims-scopes "groups" \
-claims-scopes "user" \
-max-age 20 \
-name "Vault OIDC Provider"
Auth Method information:
Created Time: Sat, 20 Nov 2021 10:14:51 JST
ID: amoidc_TUXAIBhxIF
Name: Vault OIDC Provider
Type: oidc
Updated Time: Sat, 20 Nov 2021 10:14:51 JST
Version: 1
Scope:
ID: global
Name: global
Type: global
Authorized Actions:
no-op
read
update
delete
change-state
authenticate
Authorized Actions on Auth Method's Collections:
accounts:
create
list
managed-groups:
create
list
Attributes:
api_url_prefix: http://192.168.10.175:9200
callback_url: http://192.168.10.175:9200/v1/auth-methods/oidc:authenticate:callback
claims_scopes: [groups user]
client_id: VploN0lIIZEVpqAhN7xJS3eDnLYRMGR4
client_secret_hmac: qCpF9Qb5XxlnBOKn0m8iRG7Ns00U5naYxD-dTYuwlc8
issuer: http://192.168.10.142:8200/v1/identity/oidc/provider/my-provider
max_age: 20
signing_algorithms: [RS256]
state: inactive
```
`AUTH_METHOD_ID`という環境変数に認証方式IDを格納します:
```bash
kazu634@boundary% AUTH_METHOD_ID="$(boundary auth-methods list -format json | jq -r '.items[] | select(.name == "Vault OIDC Provider") | .id')"
kazu634@boundary% echo ${AUTH_METHOD_ID}
amoidc_TUXAIBhxIF
```
認証方式の状態を`active-public`に変更します:
```bash
kazu634@boundary% boundary auth-methods change-state oidc \
-id "${AUTH_METHOD_ID}" \
-state active-public
Auth Method information:
Created Time: Sat, 20 Nov 2021 10:14:51 JST
ID: amoidc_TUXAIBhxIF
Name: Vault OIDC Provider
Type: oidc
Updated Time: Sat, 20 Nov 2021 10:16:06 JST
Version: 2
Scope:
ID: global
Name: global
Type: global
Authorized Actions:
no-op
read
update
delete
change-state
authenticate
Authorized Actions on Auth Method's Collections:
accounts:
create
list
managed-groups:
create
list
Attributes:
api_url_prefix: http://192.168.10.175:9200
callback_url: http://192.168.10.175:9200/v1/auth-methods/oidc:authenticate:callback
claims_scopes: [groups user]
client_id: VploN0lIIZEVpqAhN7xJS3eDnLYRMGR4
client_secret_hmac: qCpF9Qb5XxlnBOKn0m8iRG7Ns00U5naYxD-dTYuwlc8
issuer: http://192.168.10.142:8200/v1/identity/oidc/provider/my-provider
max_age: 20
signing_algorithms: [RS256]
state: active-public
```
`global`スコープでOIDC認証方式を利用できるようにします:
```bash
kazu634@boundary% boundary scopes update \
-primary-auth-method-id "${AUTH_METHOD_ID}" \
-id global
Scope information:
Created Time: Sat, 20 Nov 2021 10:10:04 JST
Description: Global Scope
ID: global
Name: global
Primary Auth Method ID: amoidc_TUXAIBhxIF
Updated Time: Sat, 20 Nov 2021 10:16:26 JST
Version: 3
Scope (parent):
ID: global
Name: global
Type: global
Authorized Actions:
no-op
read
update
delete
Authorized Actions on Scope's Collections:
auth-methods:
create
list
auth-tokens:
list
groups:
create
list
roles:
create
list
scopes:
create
list
users:
create
list
```
## 動作確認
ブラウザーで`http://192.168.10.175:9200`にアクセスすると、以下のように表示されるはずです:
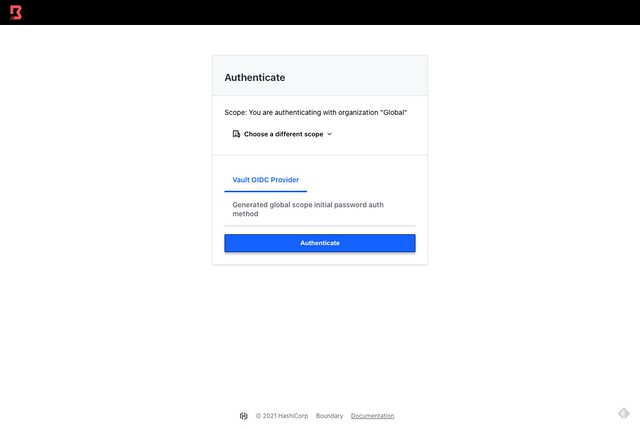 `Vault OIDC Provider`を選択して、`Authenticate`ボタンをクリックします。すると新しいタブが開いて、`Vault`のログイン画面が表示されます:
 `Username`を選択し、`end-user`と`password`を入力し、`Sign in`ボタンをクリックします。すると、`Boundary`にログインできるはずです。
## 参考リンク
- [Vault as an OIDC Identity Provider \| Vault \- HashiCorp Learn](https://learn.hashicorp.com/tutorials/vault/oidc-identity-provider)
- [Install Boundary \| Boundary \- HashiCorp Learn](https://learn.hashicorp.com/tutorials/boundary/getting-started-install)
`Username`を選択し、`end-user`と`password`を入力し、`Sign in`ボタンをクリックします。すると、`Boundary`にログインできるはずです。
## 参考リンク
- [Vault as an OIDC Identity Provider \| Vault \- HashiCorp Learn](https://learn.hashicorp.com/tutorials/vault/oidc-identity-provider)
- [Install Boundary \| Boundary \- HashiCorp Learn](https://learn.hashicorp.com/tutorials/boundary/getting-started-install)